


Introduction
You’ve been thinking about starting an affiliate website for a long time. Your friend told you that it’s easy to set up, but then she got stuck trying to figure out how to start one.
There are so many different aspects of running an affiliate website that it can seem overwhelming. But don’t worry! I’m going to show you how simple it is—and how much money you’ll make while doing it!
Pick an affiliate program

When choosing an affiliate program, it’s important to select one that fits your niche.
For example, if you are an expert on the topic of cooking and want to promote products related to cooking, then a site like Amazon or Walmart would be a good choice
because they have large customer bases that would likely benefit from the use of these products.
However, if you’re just starting out in this industry and don’t have any experience whatsoever (or even if you do), finding an affiliate program with low payout rates could be difficult since most other sites require high levels of commission before they pay out anything at all.
In addition, make sure that any company offering free trials or other benefits will also allow them on their platform as well so people can see exactly what kind of results they’ll get by using their product—and then decide whether or not it’s worth signing up themselves!
There are lots of affiliate marketing groups on Facebook where you can find good affiliate products.
Set up your website hosting

You’re now ready to set up your website. You can do this in two ways:
- Install WordPress on your site, which will allow you to create an affiliate site with the code that comes with it.
- Use a self-hosted WordPress site (i.e., one that runs on its own domain name). This is great if you want complete control over everything about how and where your blog runs, but it also requires more maintenance and technical know-how than installing through an external service provider such as Bluehost or Hostgator would require (though if this sounds like something you want to do eventually anyway—or even right away—then go ahead!).
Choose a domain name for your website

First, you need to choose a domain name. This is the address that visitors will type into their web browsers when they want to visit your site.
As long as it’s memorable and easy to spell and pronounce, this doesn’t need to be too complicated or creative—your website should ideally be able to fit into one sentence!
Here are some things we recommend:
- Choose something catchy like “Affiliate Sites Made Easy” or “The Best WordPress Traffic Booster.” These names will make people think of affiliate marketing in general before they even consider visiting your site. If possible, make sure these terms describe what exactly makes up your business (e.g., “best” being used as an adjective rather than just referring directly back at itself).
- Another good choice would be something short like “easy-to-use” instead of “useful” because shorter phrases tend not only to attract more attention but also to get read faster by people scrolling through their newsfeeds/social media feeds (which means higher conversion rates).
Set up WordPress on your site
First, you need to install WordPress on your site. Once it’s installed, go ahead and log into the dashboard of your new blog (or any other page where you want to put content).
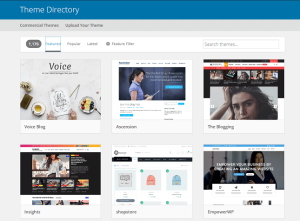
Next, choose a theme for your site by clicking on “Themes” in the left sidebar menu.
Then scroll down through all of the available themes until you find one that looks good enough to use as a starting point for building out your website.
If necessary, click “Customize” next to any theme so that its options become more accessible; this will help ensure that it looks exactly how you want it!
Finally—and this is important—make sure there’s nothing interfering with what goes into each blog post before publishing anything: no plugins or anything else should be enabled until after everything has been thoroughly tested by someone else (like me!).
Install a theme for your site
- Choose a theme that matches your niche. It’s important to choose a theme that is appropriate for the type of content you will be creating, and also make sure it has all of the features you need. For example, if you’re creating an affiliate site focused on health products, then it would be helpful to choose a WordPress theme that allows users to add their own images or videos as part of the page’s design (such as Squarespace).
- Choose one that is easy to customize. Some themes come with prebuilt templates while others allow users to add their own elements such as background images or text links without much effort (such as Divi). If possible try out both types of options before choosing one since they are both customizable in different ways! You might find yourself enjoying working with one style more than another depending on what works best for your website needs/goals.”
Add plugins to your WordPress site
Plugins are an easy way to add functionality to your site. You can use plugins that provide social media integration, analytics, and other useful features.
There are thousands of them available online and they’re easy to find on the WordPress Plugin Directory (which we’ll talk about in more detail below).
Decide what type of content you want to create
You can choose to write about a product you’re an affiliate for, or you can write about a topic that interests you.
If the latter, it is important to keep in mind that your content should be relevant to your audience and their interests.
This means that if they are searching online for information on how to grow their business or earn more money, then it would make sense for them to read what you have written about.
If people aren’t interested in these topics and topics related only contribute nothing to their lives, then why would anyone read them?
Buy or create images for your content
- Buy or create images for your content. If you don’t have any pictures to work with, it’s time to start looking around for some. You can find images on stock photo sites and in the public domain—just remember that not all of them are suitable for use on an affiliate site. Also note that most stock photography companies offer free licenses of their photos (or even outright publish them themselves), so if you want more than just a few images from one source, this might be a good option for you!
- Use an image search tool like Canva to find suitable images for your page(s). There are hundreds of free tools available online that make finding suitable stock photos easy and fast; I recommend checking out Canva if no other options appear when searching through Google Images results in pages (or elsewhere).
- Edit those images using Adobe Photoshop Elements or GIMP if needed—there’s no reason why anyone should have to pay extra money just because they want their photos edited professionally!
Write and publish a blog post
Once you have your site set up, it’s time to write and publish a blog post.
- Create a draft of the post
- Add images to the post and publish the post
Now that you have published your content, it’s time for promotion! You can promote these posts in any way that works for you; social media accounts, email newsletters and newsletters from other websites are all great ways of getting more people reading about what you’ve been writing about lately!
With these steps, you can get your affiliate site off the ground.
With these steps, you can get your affiliate site off the ground.
Go to [this page](https://www.affiliatesystemsreview.com/wordpress) and click on “Create New Site”. Now enter a name for your site and select whether it will be a one-time payment or recurring revenue model.
You’ll also need to choose whether or not you want to create an unlimited number of sites on this account (if so, then there will be no limit). Once this information is entered into WordPress’ form fields, click “Create Site”.
Conclusion
So there you have it: the five steps for creating an affiliate site in WordPress. The last step is to ensure you’ve installed a theme, and plugins, and choose images that will work well with your theme.
Once you have completed these five steps, then sign up for any of the affiliate programs mentioned above and get started!